

This post is sponsored by People’s Food Co-op What is Modern Homesteading?
Historically, homesteading refers to families that took advantage of government programs starting in the 1850’s and beyond to receive free land in exchange for moving to an area that the government was looking to populate.
Over the years, homesteading had become synonymous with self-sustaining practices such as growing your own food, creating your own textiles, and craftwork. In recent years, such practices have made a resurgence and modern homesteading can now be considered a cultural movement.
During quarantine in early 2020, the popularity of modern homesteading practices skyrocketed. The great thing about modern homestead is that it is no longer associated with where you live, but instead how you live. Modern homesteading allows a family or an individual to make or create the items they consume and use.
This series, sponsored by People’s Co-op, will teach you how to ferment your own vegetables, brew kombucha, bake bread with your own sourdough starter, make your own bath bombs, and hand-pull mozzarella.
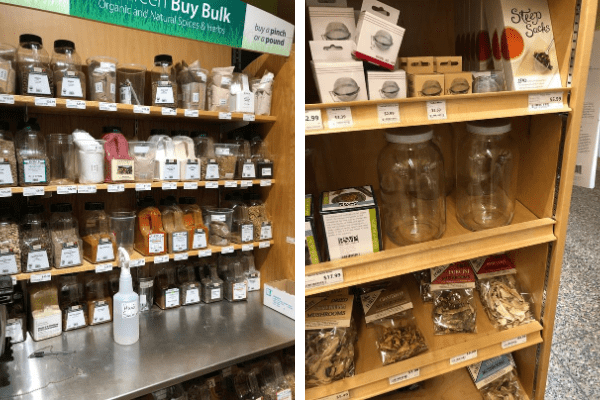
The majority of the items listed in this series are available at People’s Food Co-op, including some speciality items that are harder to find!
Vegetable Lacto-Fermentation
Lacto-Fermentation is an ancient way of preserving vegetables. This type of fermentation can be found in food cultures worldwide. Think kimchi, sauerkraut, and kosher dill pickles! Fermenting has regained popularity in recent years due to our understanding of how probiotics benefit our gut. And more and more healthcare professionals worldwide are researching and starting to understand how much a healthy gut affects all aspects of our health. Fermented vegetables are a fantastic source of healthy, naturally forming probiotics!
Lacto-Fermintation is the process of taking the good bacteria (Lactobacillus) naturally found in fruits and vegetables and using it to preserve the food you are fermenting.
Today, we’re specifically talking about vegetables. Lacto-Fermentation happens in two steps. The first is to create a salty environment where the bad bacteria cannot thrive but our Lactobacillus can. The second is to allow the Lactobacillus to get to work! This bacteria works to covert the naturally forming sugars in vegetables to be converted to lactic acid that will preserve your vegetables.
Your options are endless! Popular vegetables to ferment include: cucumbers, carrots, cabbage, radishes, cauliflower, green beans and more! There is a very simple formula to get started:
3-5 tablespoons of salt for every quart of water you use.
Too salty of an environment and the lactobacillus cannot convert to lactic acid. Not salty enough means that the bad bacteria will not be killed off. The formula above ensures that you will create the perfect environment for your vegetables to ferment. You can play a bit with the type of salt you use (kosher, sea salt, and table salt will all produce different types of salt levels and test) and how salty you like your vegetables. But if you stay within the formula you will create the ideal environment for fermentation.
Kosher Dill Pickles
I hate pickles. Or at least I thought I did! I loved the idea of pickles. In my mind I imagined them to be super flavorful, crunchy vegetables…What’s not to love? For me, it was the vinegar. SO INTENSE. And the floppy, mushy texture of a lot of pickles.
A few years back I was at Sekapp Apple Orchard with my family. There was a guy there selling pickles in a big barrel. It was towards the end of the day and he was selling pickles for half off. I said, no thanks. He told me these would be the best pickles I’ve ever tried, even if I didn’t like pickles. I said, no thank you. He said, he would give me the pickle if I just tried it. I mean, clearly we were dealing with a pickle fanatic. I didn’t want to disappoint him, so I said yes. And here’s where my journey of fermenting my own pickles begins!
Turns out all the pickles I had ever tried were preserved with vinegar. Try as I might, I have never been able to love punchy, in-your-face vinegar. And for that reason, could never love pickles. The pickle I tried that day was a kosher dill pickle…a fermented pickle preserved by using salt and not vinegar! Contrary to belief, a kosher dill pickle is not named that way because it is a kosher food, but because it was made popular in New York Jewish owned delis.
Here’s my recipe to make Kosher Dill Pickles. All of these items and ingredients can be found at People’s Food Co-op! I also have a secret ingredient…oak leaves! The tannins in oak leaves are said to create an extra crispy pickle. Although there are a lot of steps, these cucumbers can come together in about 15-20 minutes.
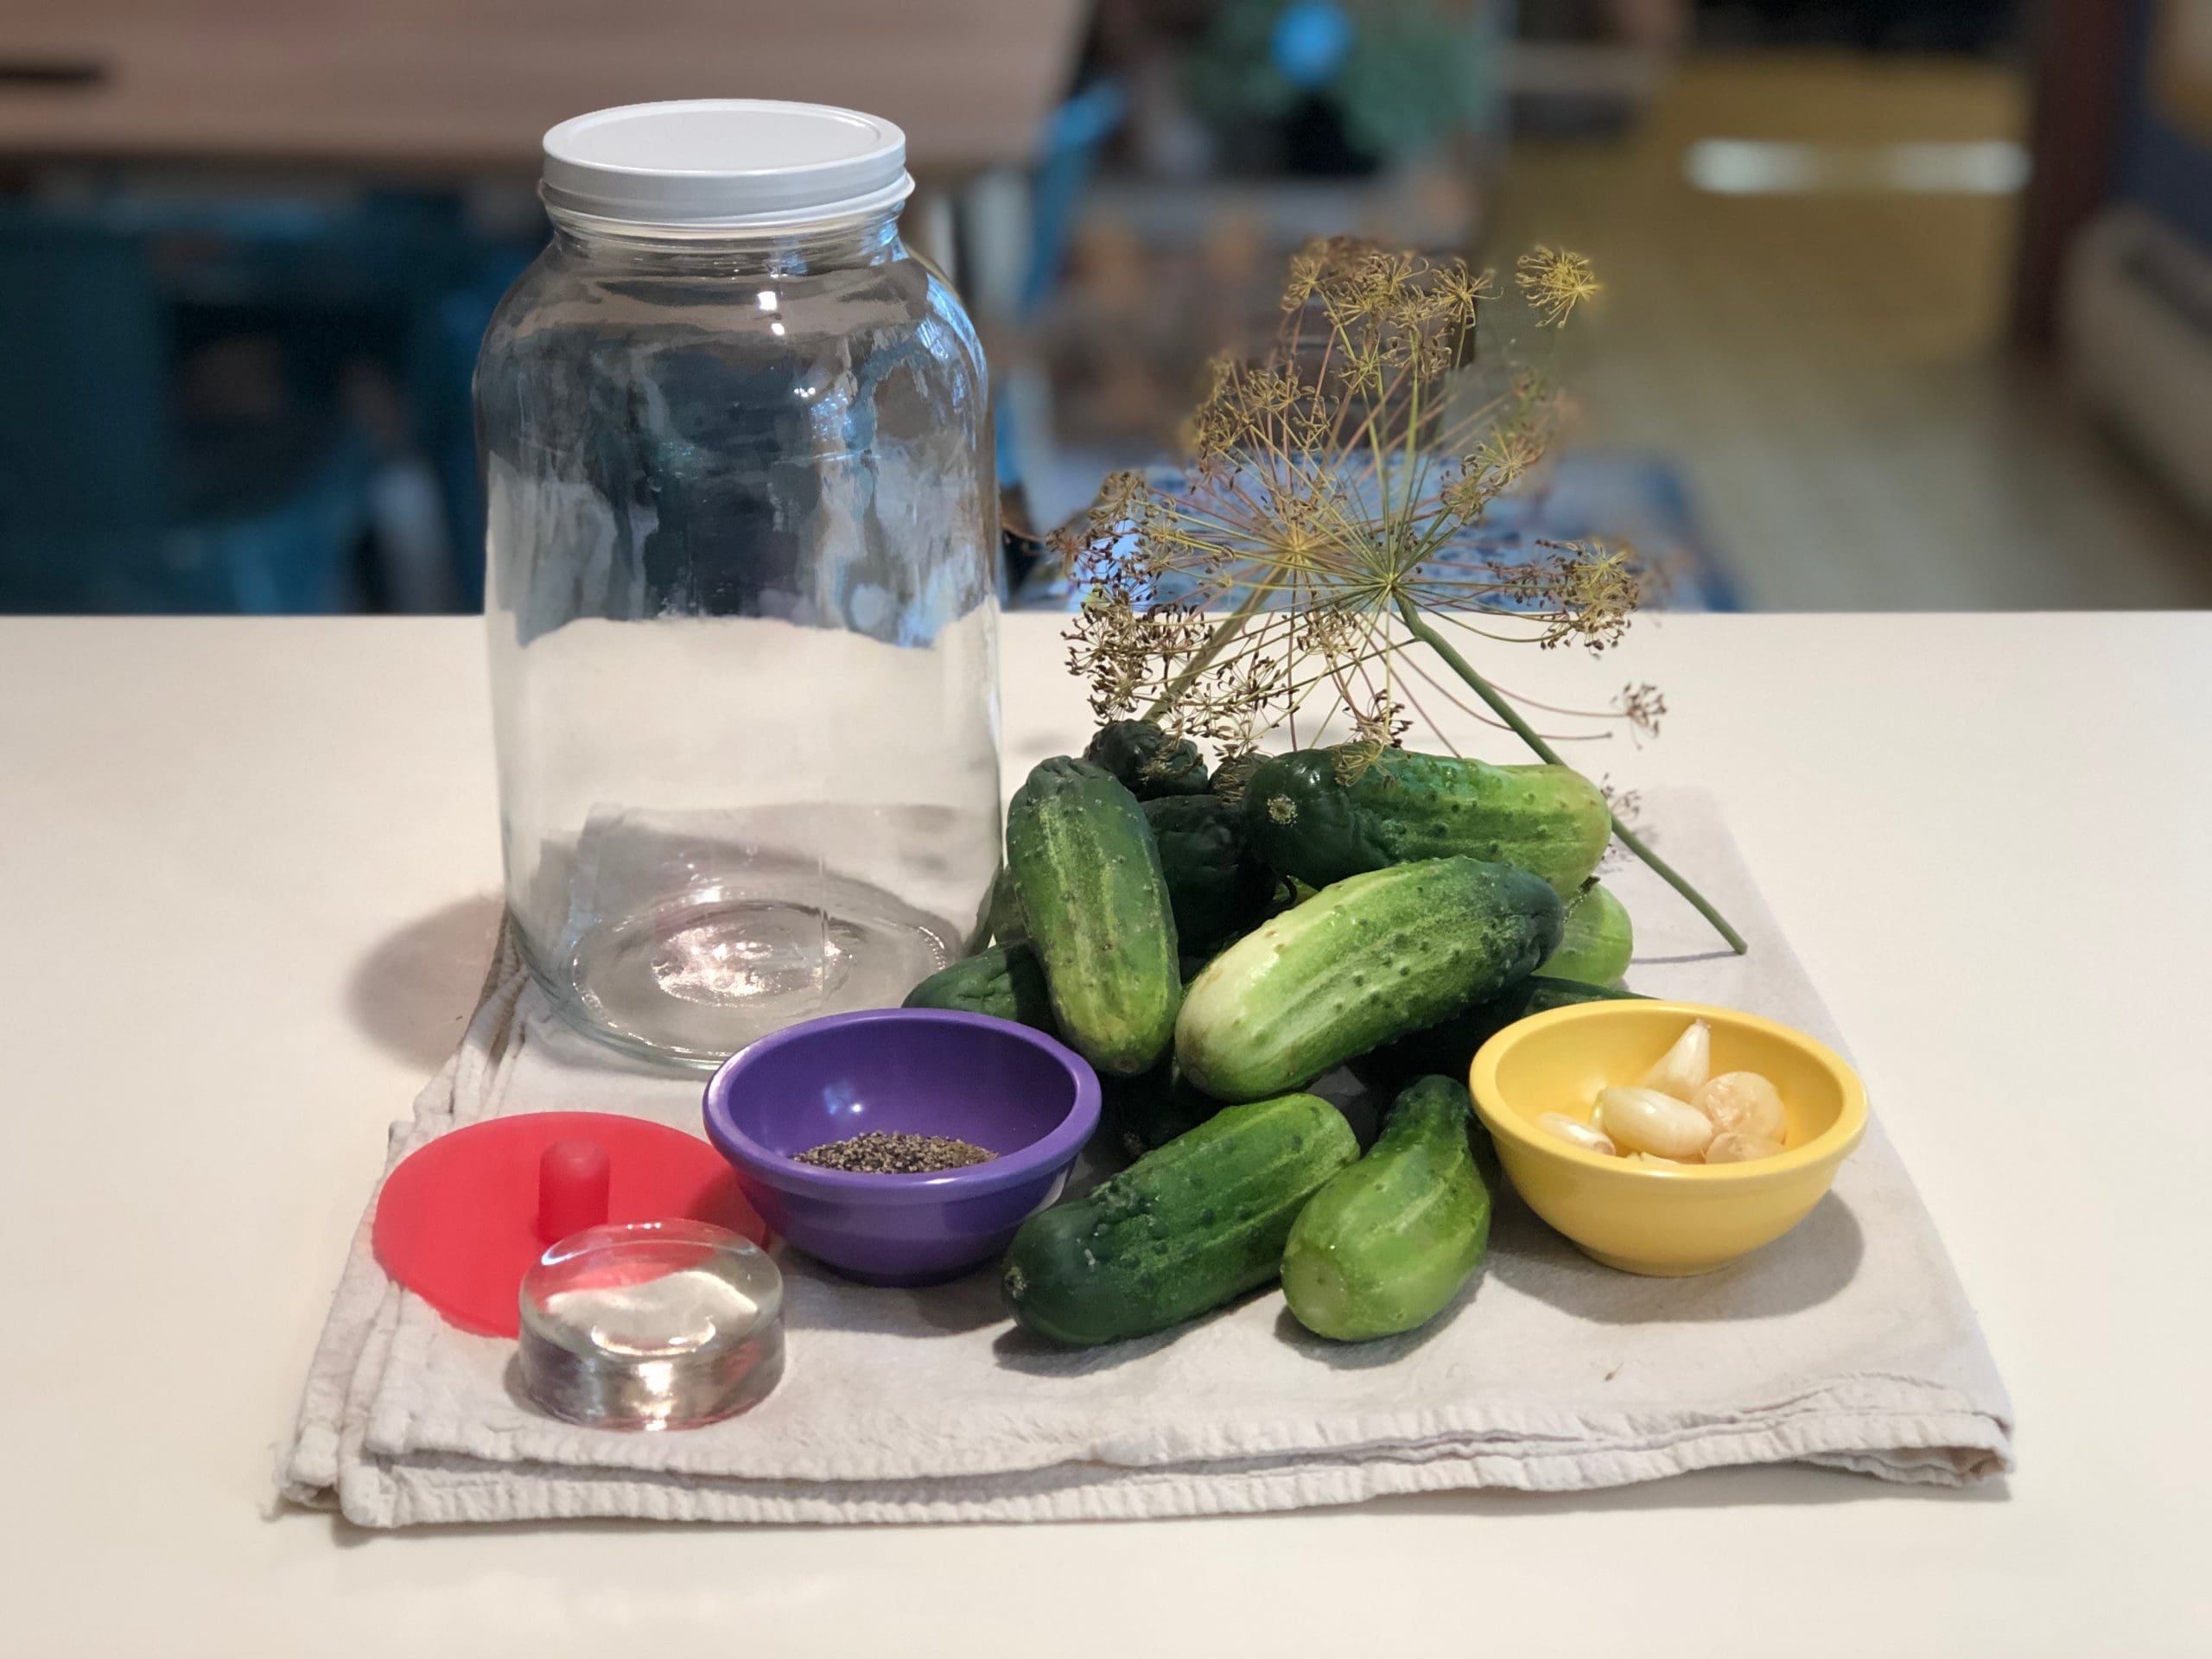 Ingredients and Supplies:
pickling cucumbers
6-10 tablespoons salt
8-10 cloves of garlic (peeled)
3-5 heads of seeded dill
spices to taste (mustard seed, black peppercorns, red pepper flakes, celery seed)
6-10 washed oak leaves
half gallon, wide mouth mason jar or other wide mouth storage jar (make sure it is very clean, but no need to sterilize)
pickle pipe (optional) or coffee filter
fermentation weight (optional)
Steps
Step 1: scrub the cucumbers, cut the stem end of the cucumber off*, and set in an ice water bath (another tip for extra crunch!)
Step 2: Prepare the salt brine in a separate bowl or container. Dissolve 6-10 tablespoons of salt in 2 quarts of warm water
Step 3: peel garlic and prepare your spices
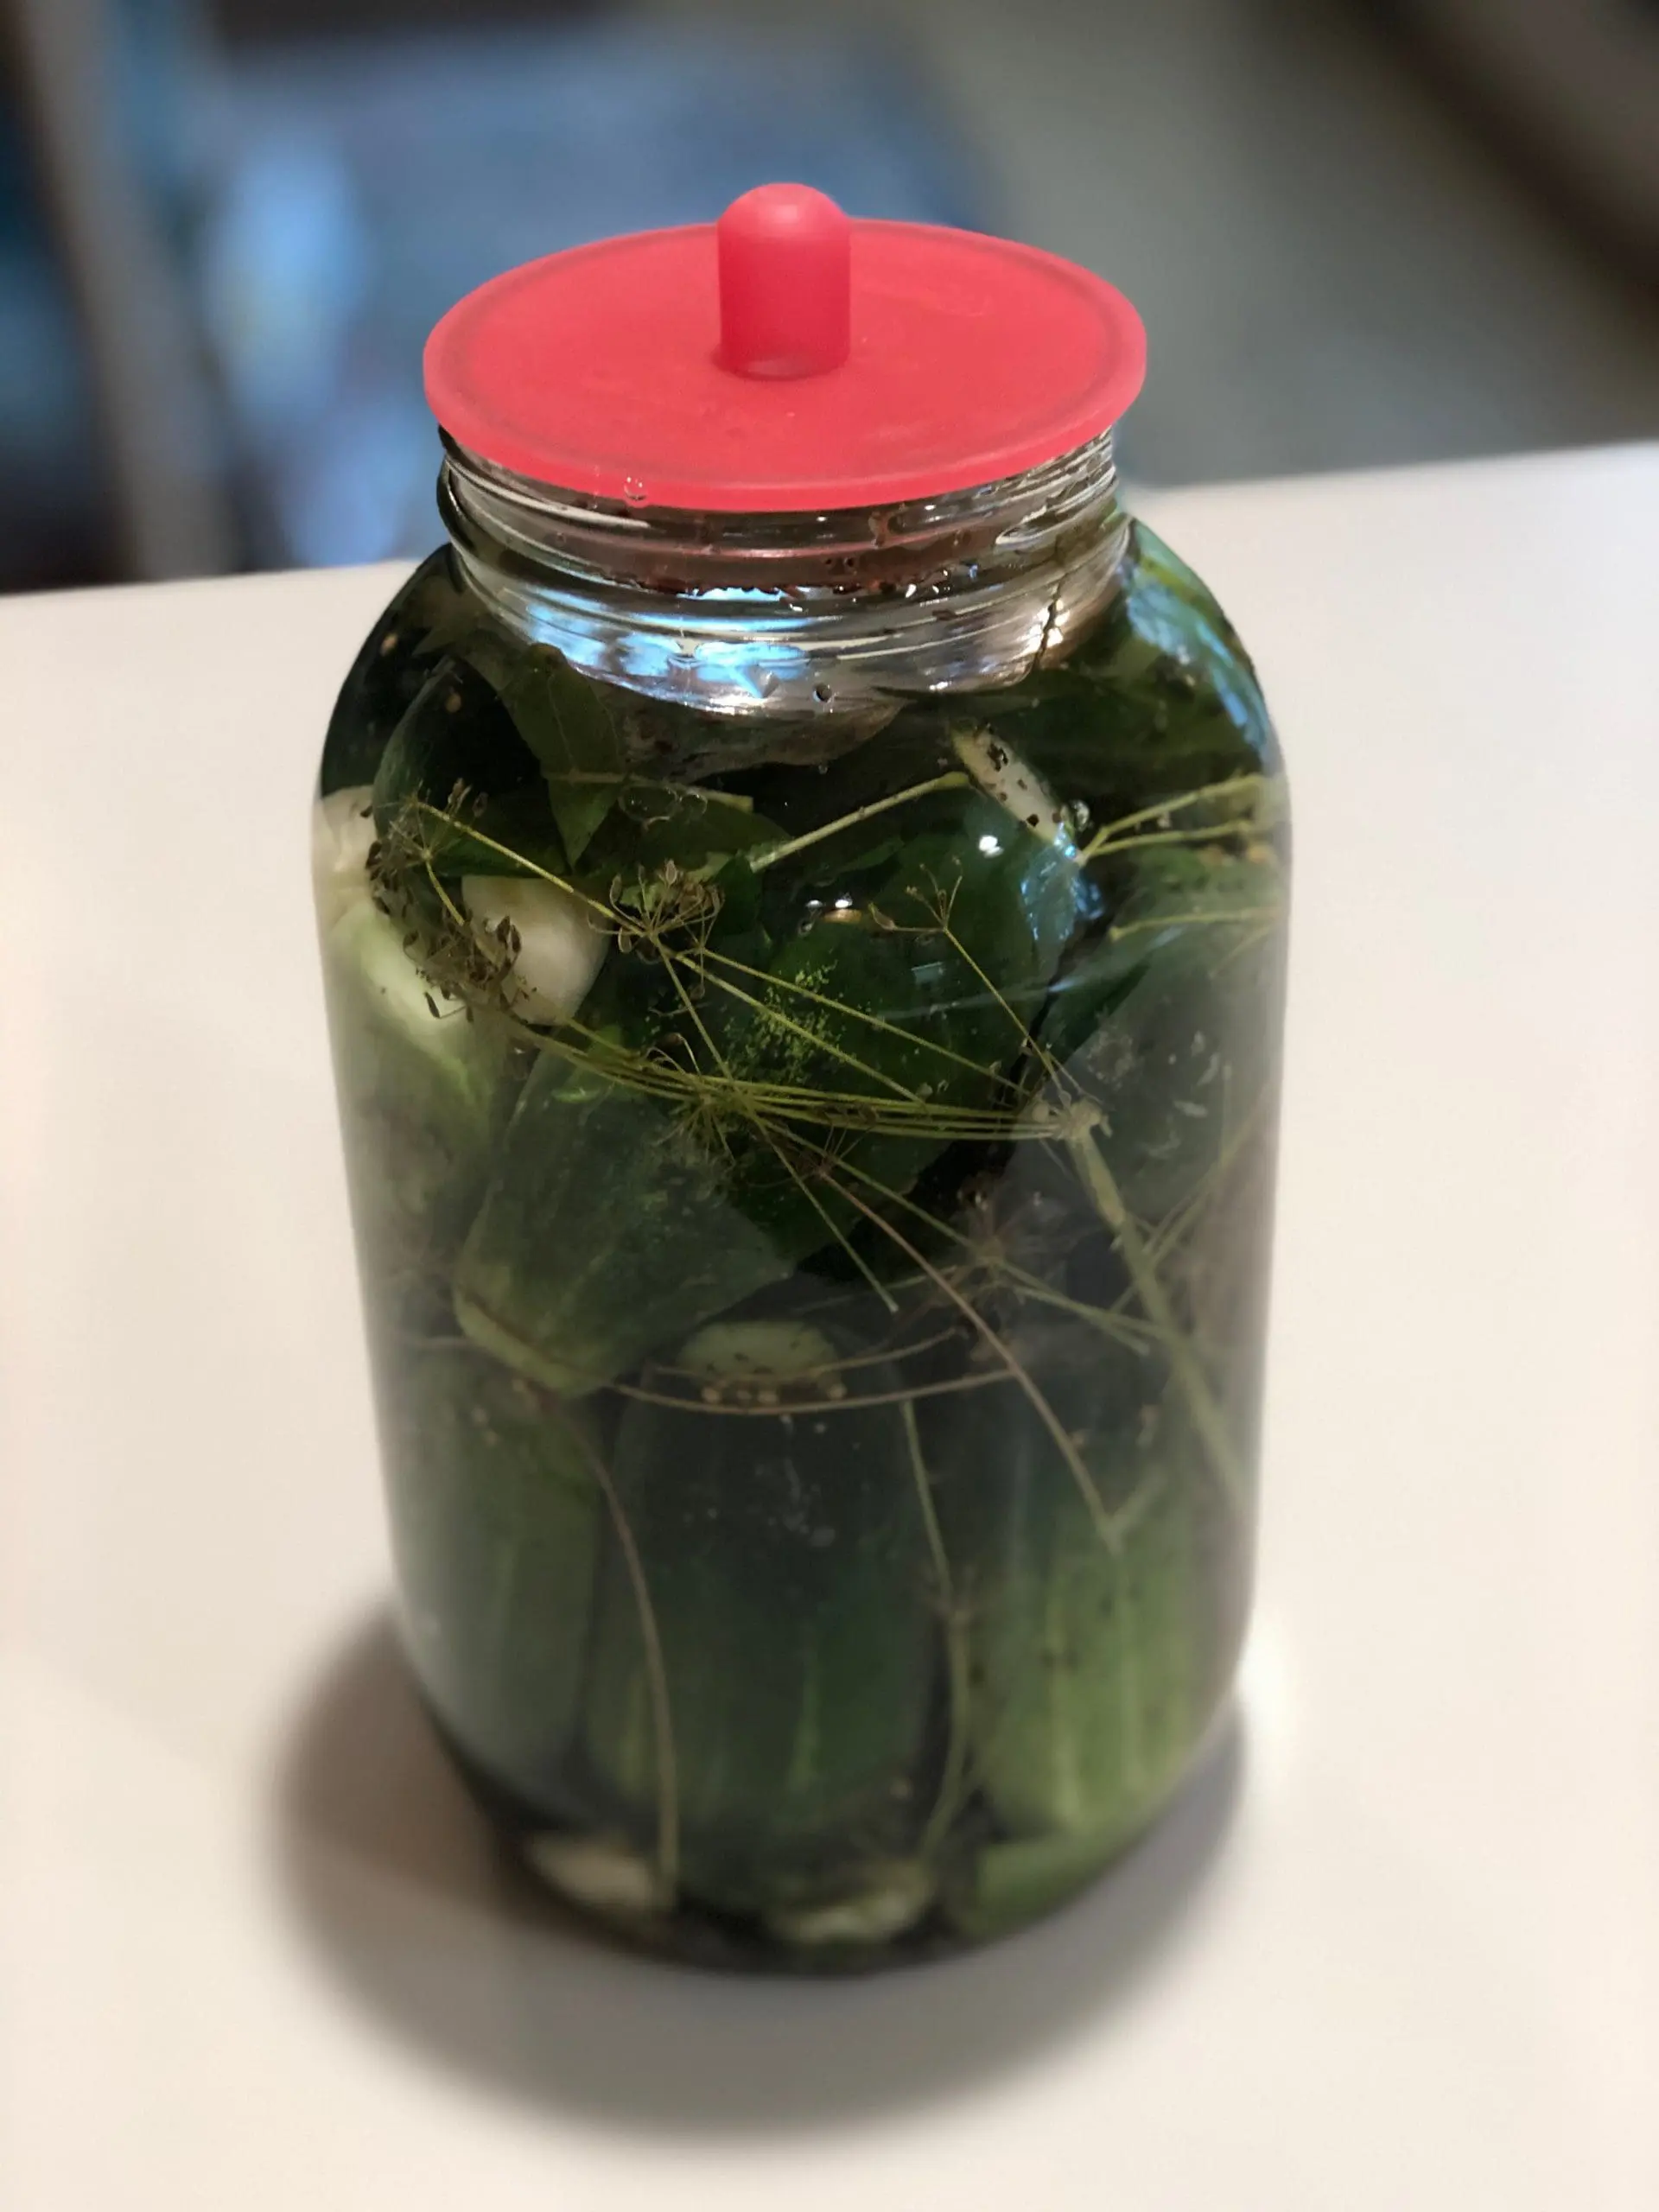
Step 4: add oak leaves, half the garlic, half the spices, and the heads of seeded dill to the bottom of the jar.
Step 5: start adding the pickles upright into the jar (tip: to start, this is easier to do with the jar on its side). Pack them in as tight as you can.
Step 6: add a layer of oak leaves, and the rest of the garlic and spices.
Step 7: add another layer of upright pickles into the jar, packing them in as tight as you can.
Step 8: End with a layer oak leaves
Step 9: Pour the salt brine over the pickles. Leave about 1″ to 2″ of headspace at the top.
Step 10: Add a weight (I like to use a fermentation weight. Simply a heavy, glass disc.) to the top of the vegetables to keep everything submerged.
Step 11: Place a pickle pipe or a coffee filter on top of the jar. If using a coffee filter, simply secure it with a rubber band around the top of the jar. A pickle pipe allows the pressure from the fermentation to build up under a silicone lid with small slits and then “burps” the jar when the pressure has built up enough.
Step 12: Place the jar on the counter. You will begin to see bubbles rising to the top of the jar within hours. This is the lactic acid preserving your pickles! After a few days the water will turn cloudy. This is normal.
When the pickles have reached your desired taste, remove the coffee filter or pickle pipe and replace with a lid. Move to the refrigerator to stop the fermentation process. Your pickles will keep up to 6 months.
 Note: There is very little chance that your pickles will spoil. The salty environment is simply a place where bacteria do not like to hang out. If you are concerned something is spoiled, give it the sniff test. You’ll KNOW if something spoiled.
*The stem end contains enzymes that will turn your pickle mushy. No good! Cut just a tiny sliver off to prevent this.

Dilly Carrot Sticks
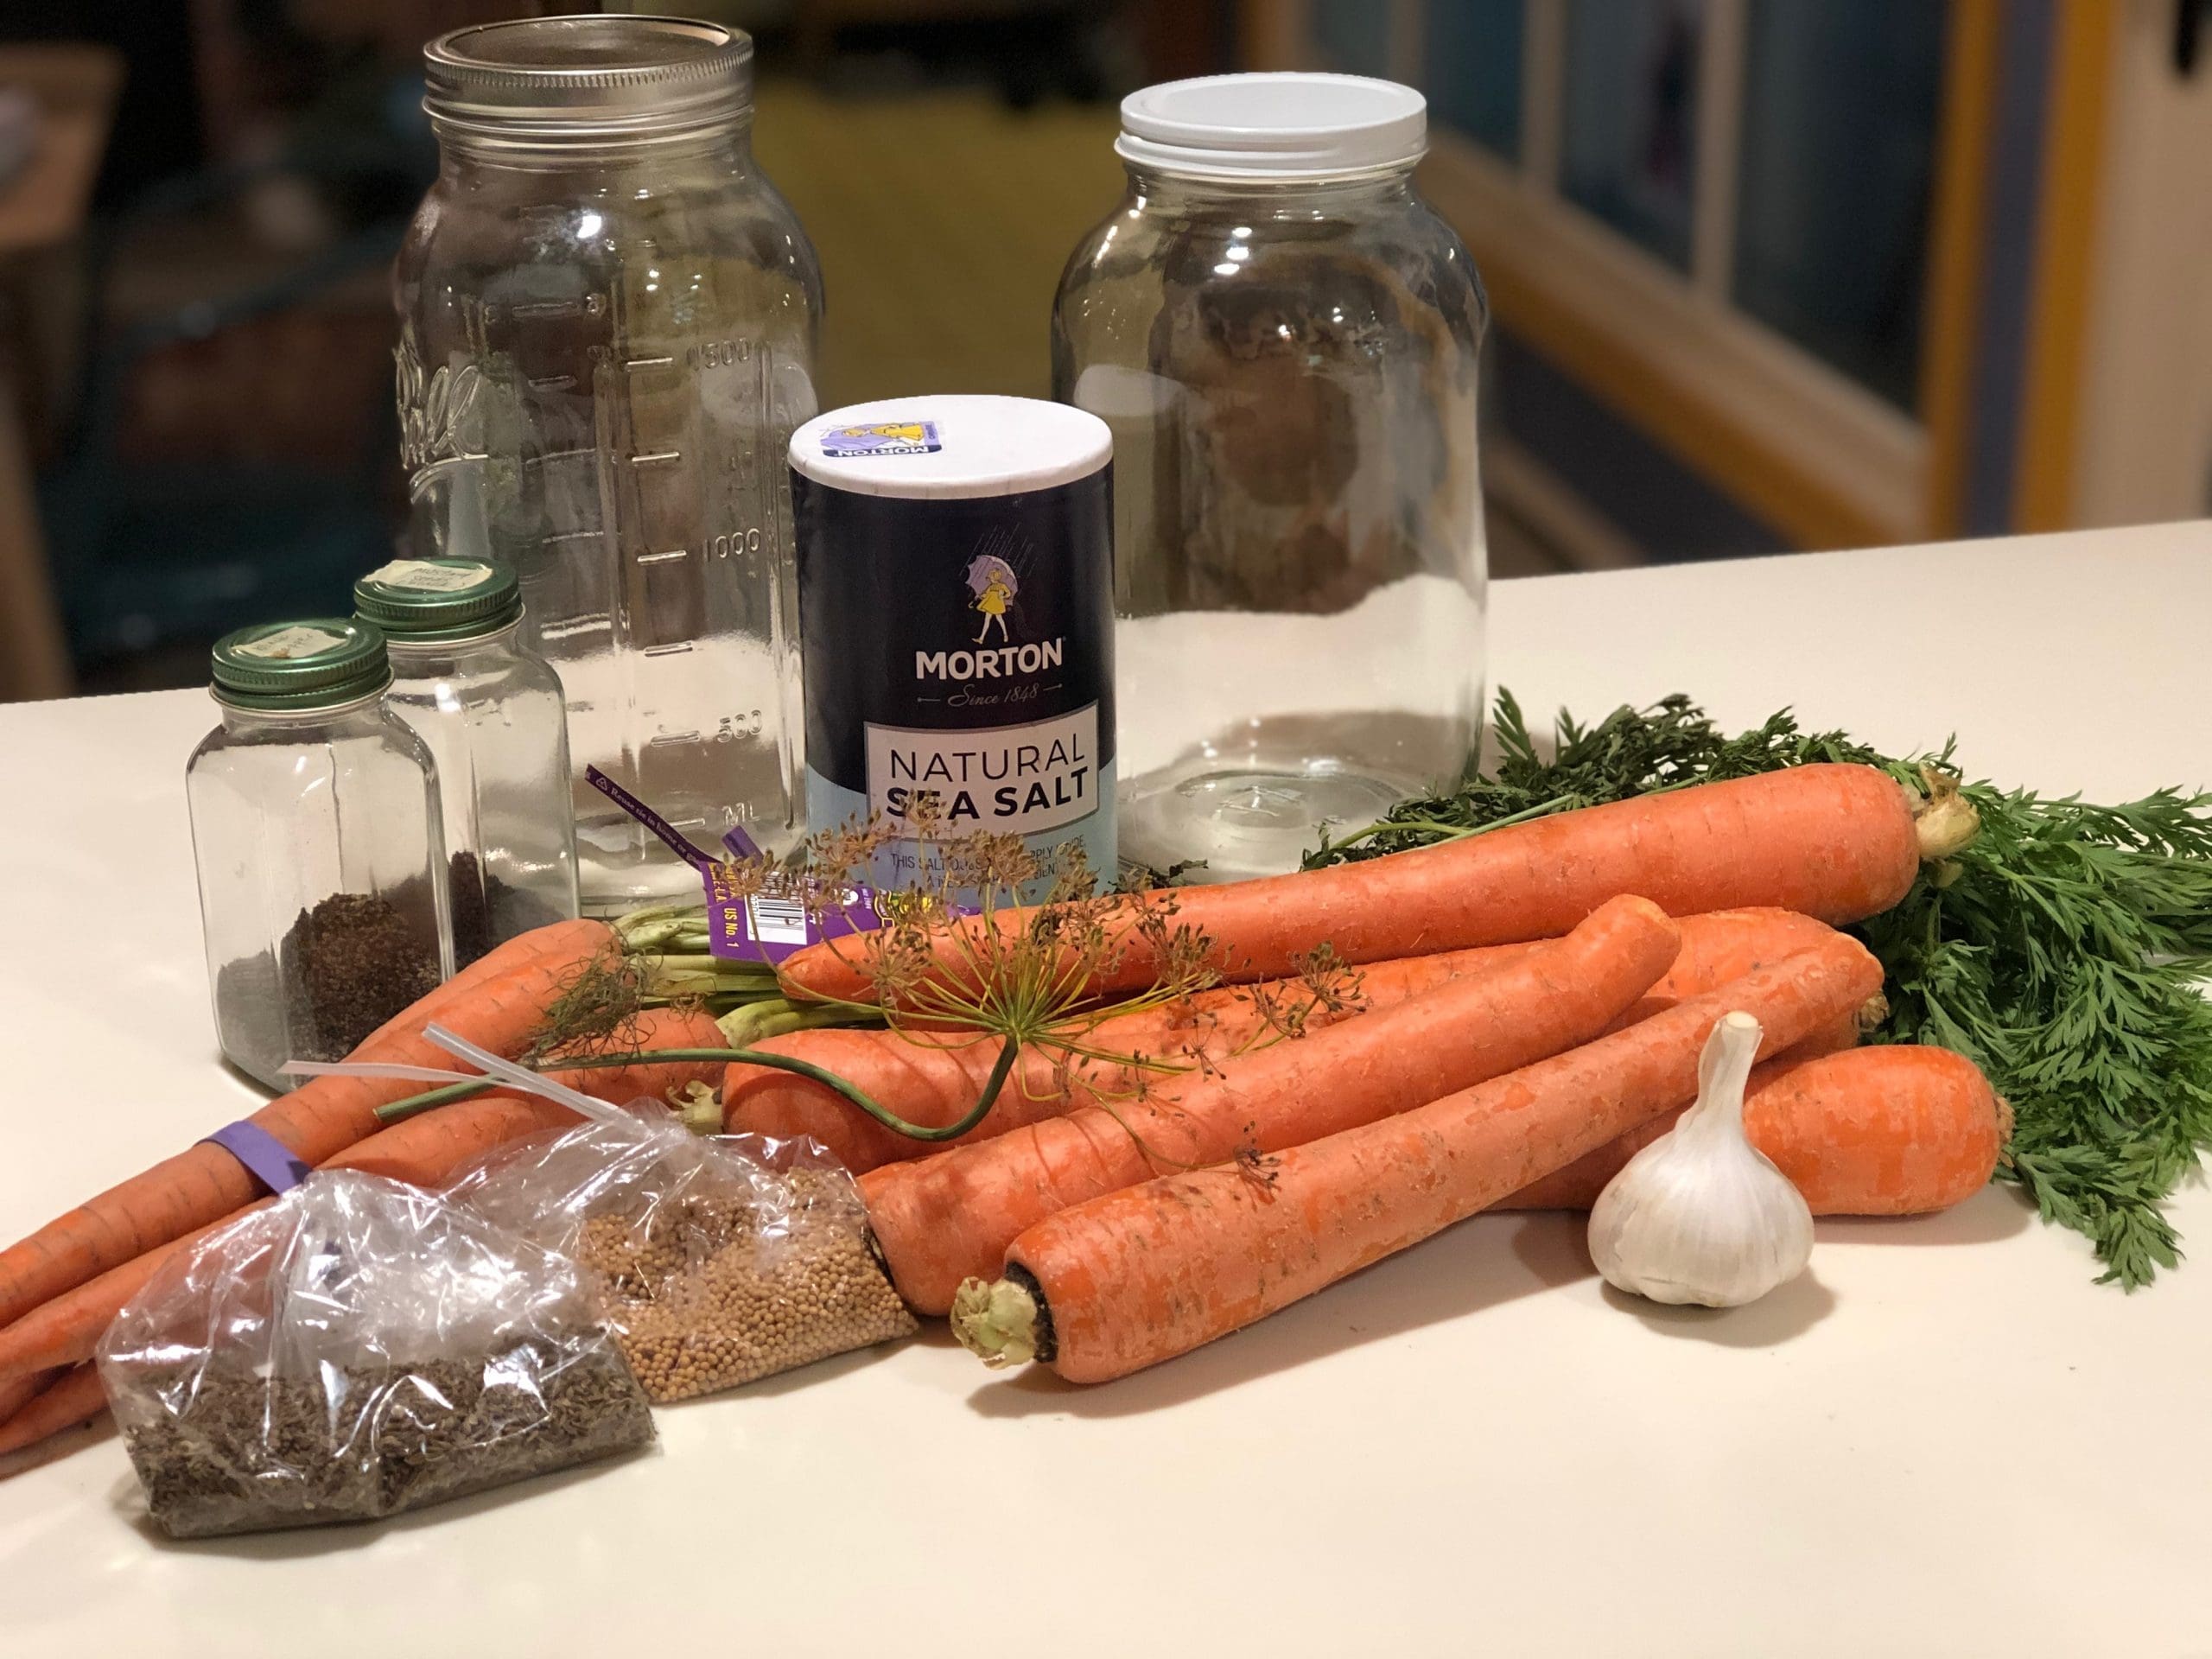 My kids are pretty picky eaters but still both really love this fun and crunchy snack! The ingredients at the steps are almost the same as the kosher dill pickles above. A few notes:
- I love using fresh, local carrots. SO much more flavorful! If the carrots are big, I will peel and cut into sticks. However, I also like to add entire carrots into the jar (peel on) if they are small enough. Just be sure to scrub them.
- I use a bit less garlic and none of the other spices. I do increase the amount of seeded dill because I love dill!

People’s Food Co-op
Almost all of the items I listed above can be found at People’s Food Co-op. When I went last weekend, they had the most beautiful locally grown carrots, pickling cucumbers, garlic, and stems of seeded dill. (If you can’t find full stems of seeded dill, you can find dill seed in the bulk spice section.) I also grabbed a half gallon jar and my spices from the bulk section. We also love these pickle pipes and these fermentation weights!

2020 note: People’s Food Co-op has added additional safety measures to ensure that you are buying with confidence during Covid-19. You’ll find hand washing stations, disinfectant, hand-sanitizer, and more.
Thank you to Cultures for Health and The Spruce Eats for being my original sources to learn lacto-fermentation!