 I recently took up the hobby of bread baking – and I LOVE it!! I found my friend Tricia’s post on how to make sourdough super inspiring. She was even nice enough to give me some of her starter. Once I got hooked on working with sourdough, I quickly expanded to other types of breads. And since I have been purchasing 100% whole wheat sandwich bread for my family for forever, I thought to myself, “How hard can it be to make a yummy whole wheat bread at home?!” Turns out… it was kinda tricky.
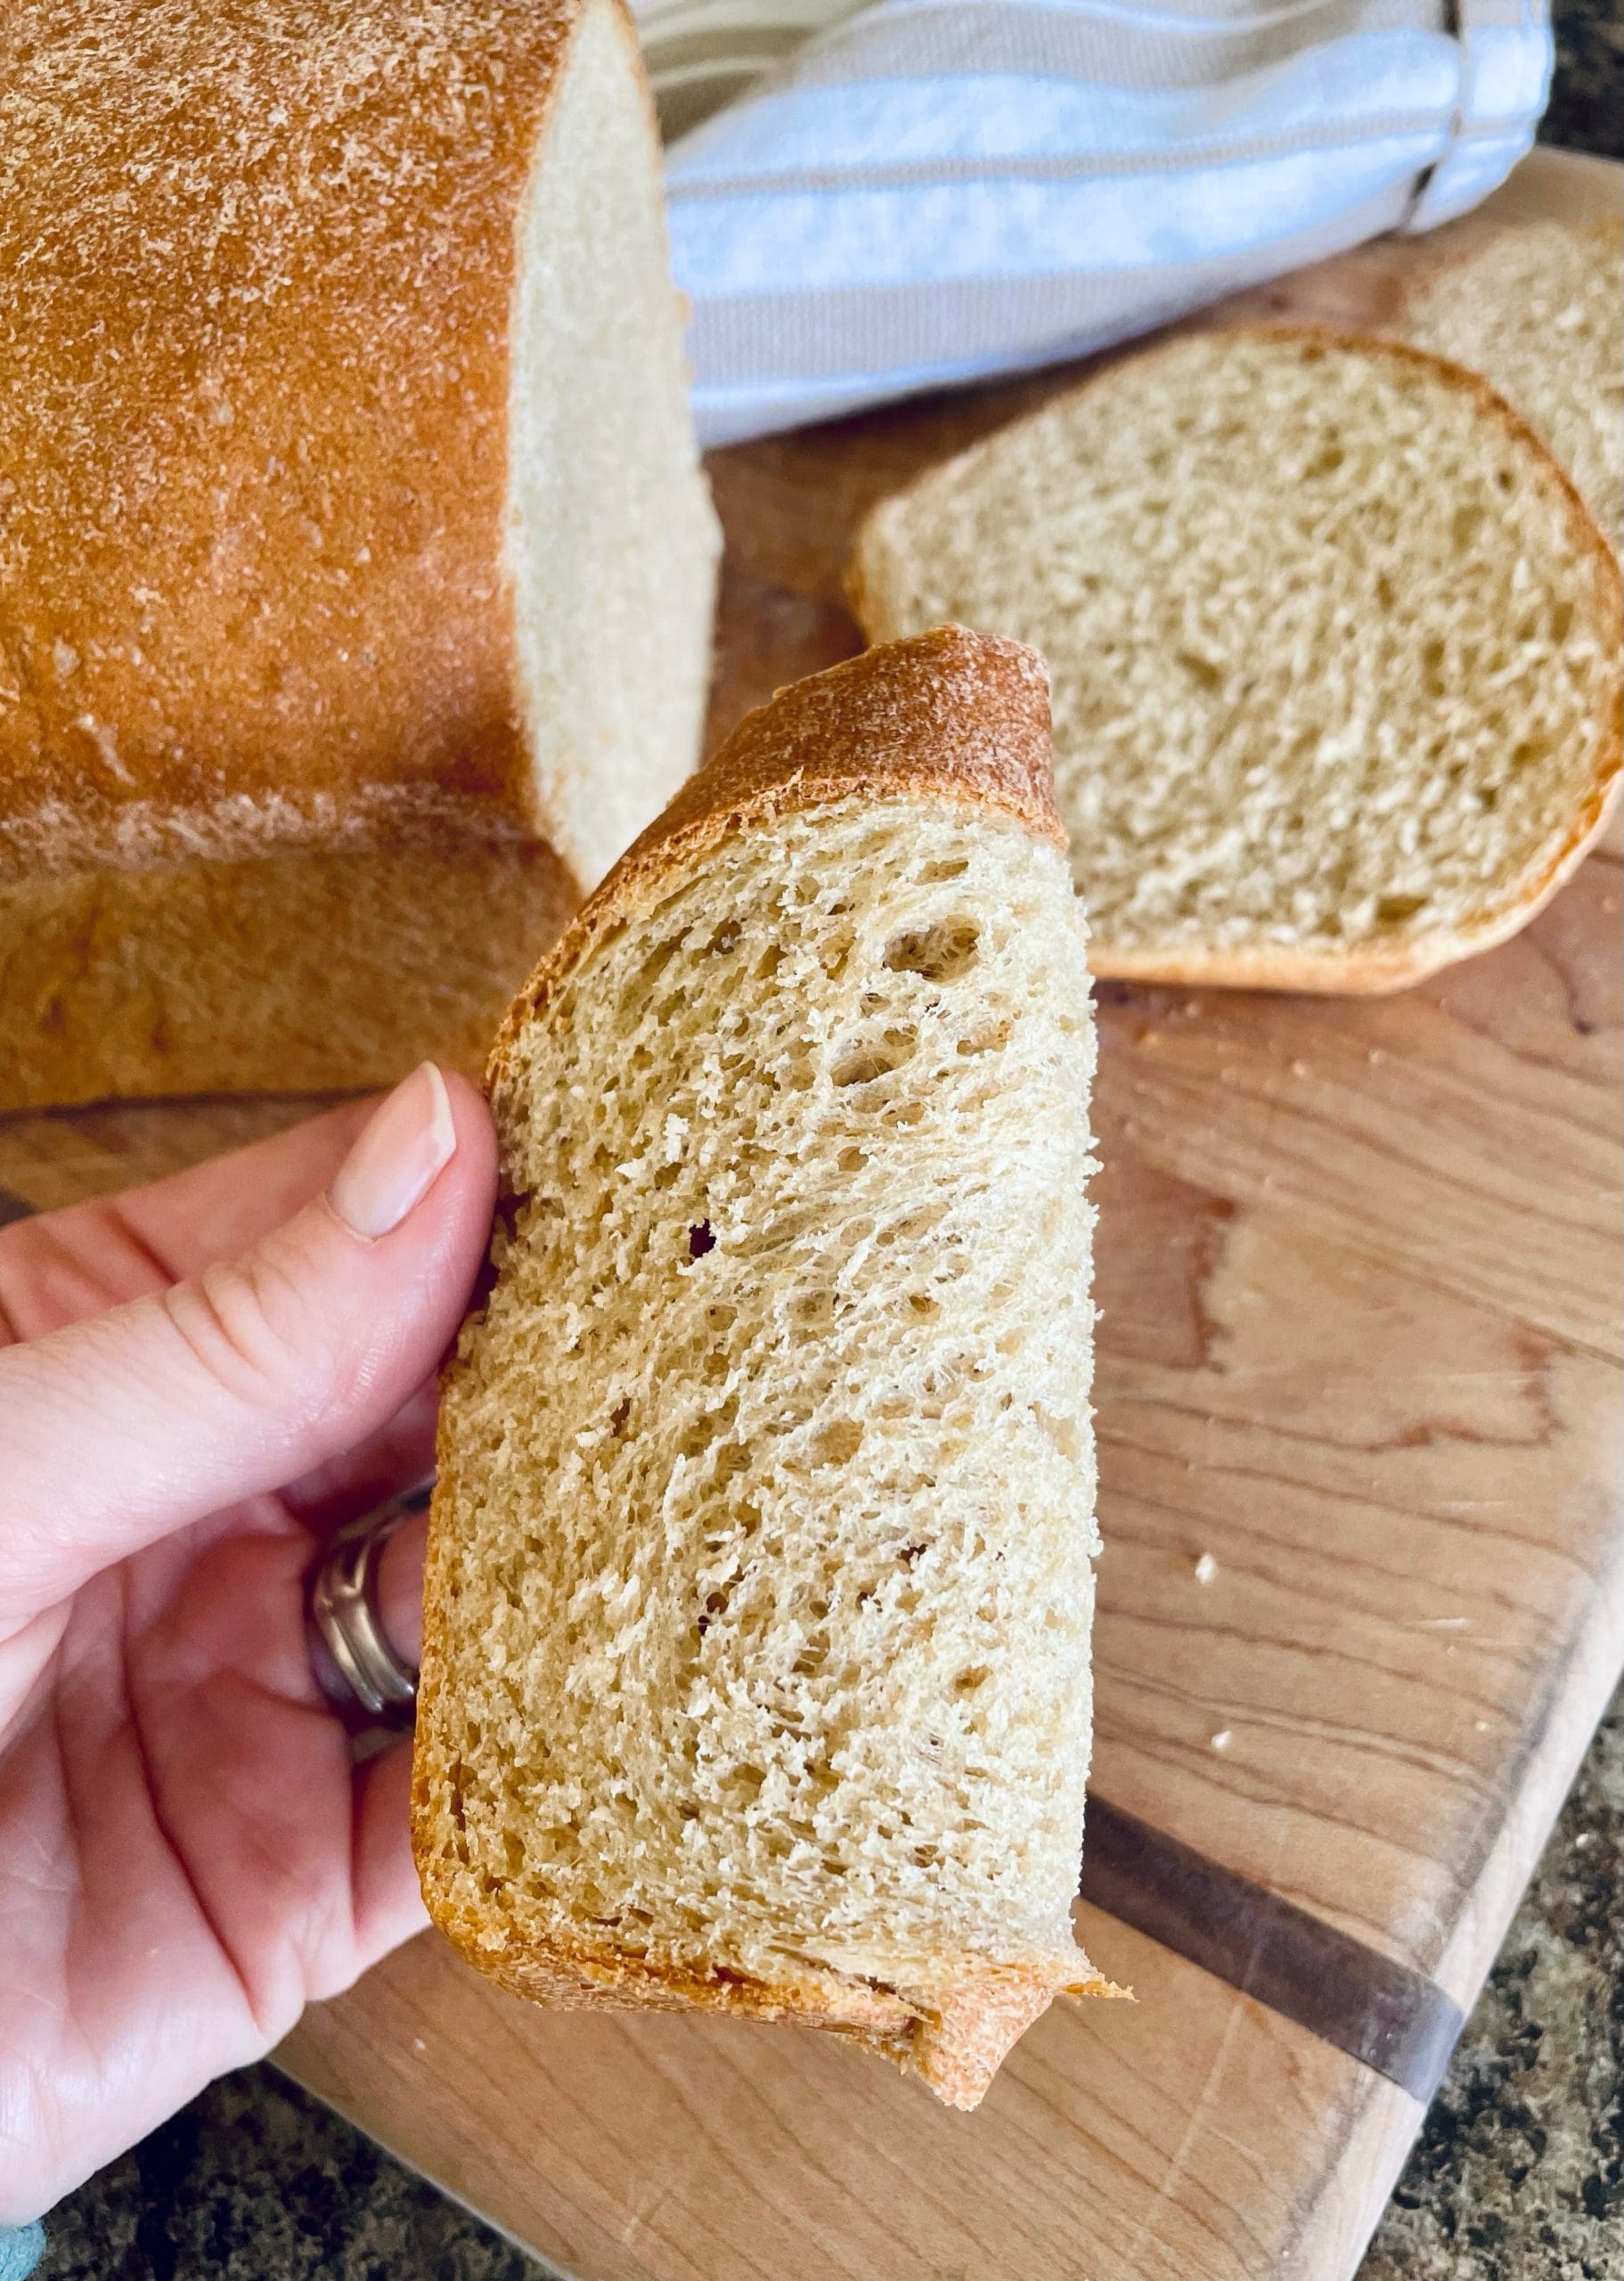
All the recipes I found online were fairly similar and everyone raved that their bread was light and fluffy. Yet all of my breads turned out dense and tasted very strongly of whole grain. But, with each attempt I took notes and made small changes. After 6 weeks and probably 20+ loaves of bread, I am going to save you all the time I spent troubleshooting. Here are the things I learned, followed by my 100% Whole Wheat bread recipe that is now spot on!
Things to Consider:
Yeast – Some recipes called for ‘Active Dry’ yeast while others listed ‘Instant’ yeast. In the beginning, I was unaware that there was a difference. But apparently, Instant yeast is the manufactured version of yeast that is 100% active and less susceptible to temperature and ingredient interactions. On the other hand, Active Dry yeast could be completely dead – even right out of the box. Instant yeast is definitely the way to go! Unfortunately, most of my grocery stores only carried Active Dry yeast. I ended up ordering an instant yeast from Amazon and noticed a big difference in my breads right away. (Some recipes may not be so sensitive to the type of yeast but this whole wheat bread was definitely touchy.)
Kneading – I only knead this bread by hand. I know 12 minutes sounds like a long time to stand at the counter and knead bread but I have actually found it to be rather soothing. I tried making this bread using my dough hook in a stand mixer but it just didn’t have the same texture as when I kneaded by hand.
Proofing Temperature – Another big difference I noticed in my bread came when I started using a heating pad for my proofing times. I set my bowl on a regular, old heating pad set to medium to medium-high heat. My heating pad was roughly 90-100 degrees F. I think you could possibly also use a warming burner on your stove if you have one. Either way, the warmer temperature was key! (Update: Do not use a heating pad for proofing if your home is more than 75 degrees. This King Arthur article is very helpful at finding the Desired Dough Temperature.)
Flour – The amount of protein in your flour will change how much gluten is formed. I have been using the same brand of flour from day 1 (see ingredient list) but still found that my loaves would collapse in the oven. Over the last couple weeks, I have been adding in a Vital Wheat Gluten Flour in addition to the whole wheat flour and that has really helped as well.
Measuring ingredients – I quickly learned to skip over the whole wheat recipes that used cups and tablespoons for measuring. The only way to get exact measurements every time is to invest in a food scale and weigh out the ingredients. I didn’t spend an arm and a leg on my food scale but have really liked it! (see equipment list)
Okay, now onto the recipe!
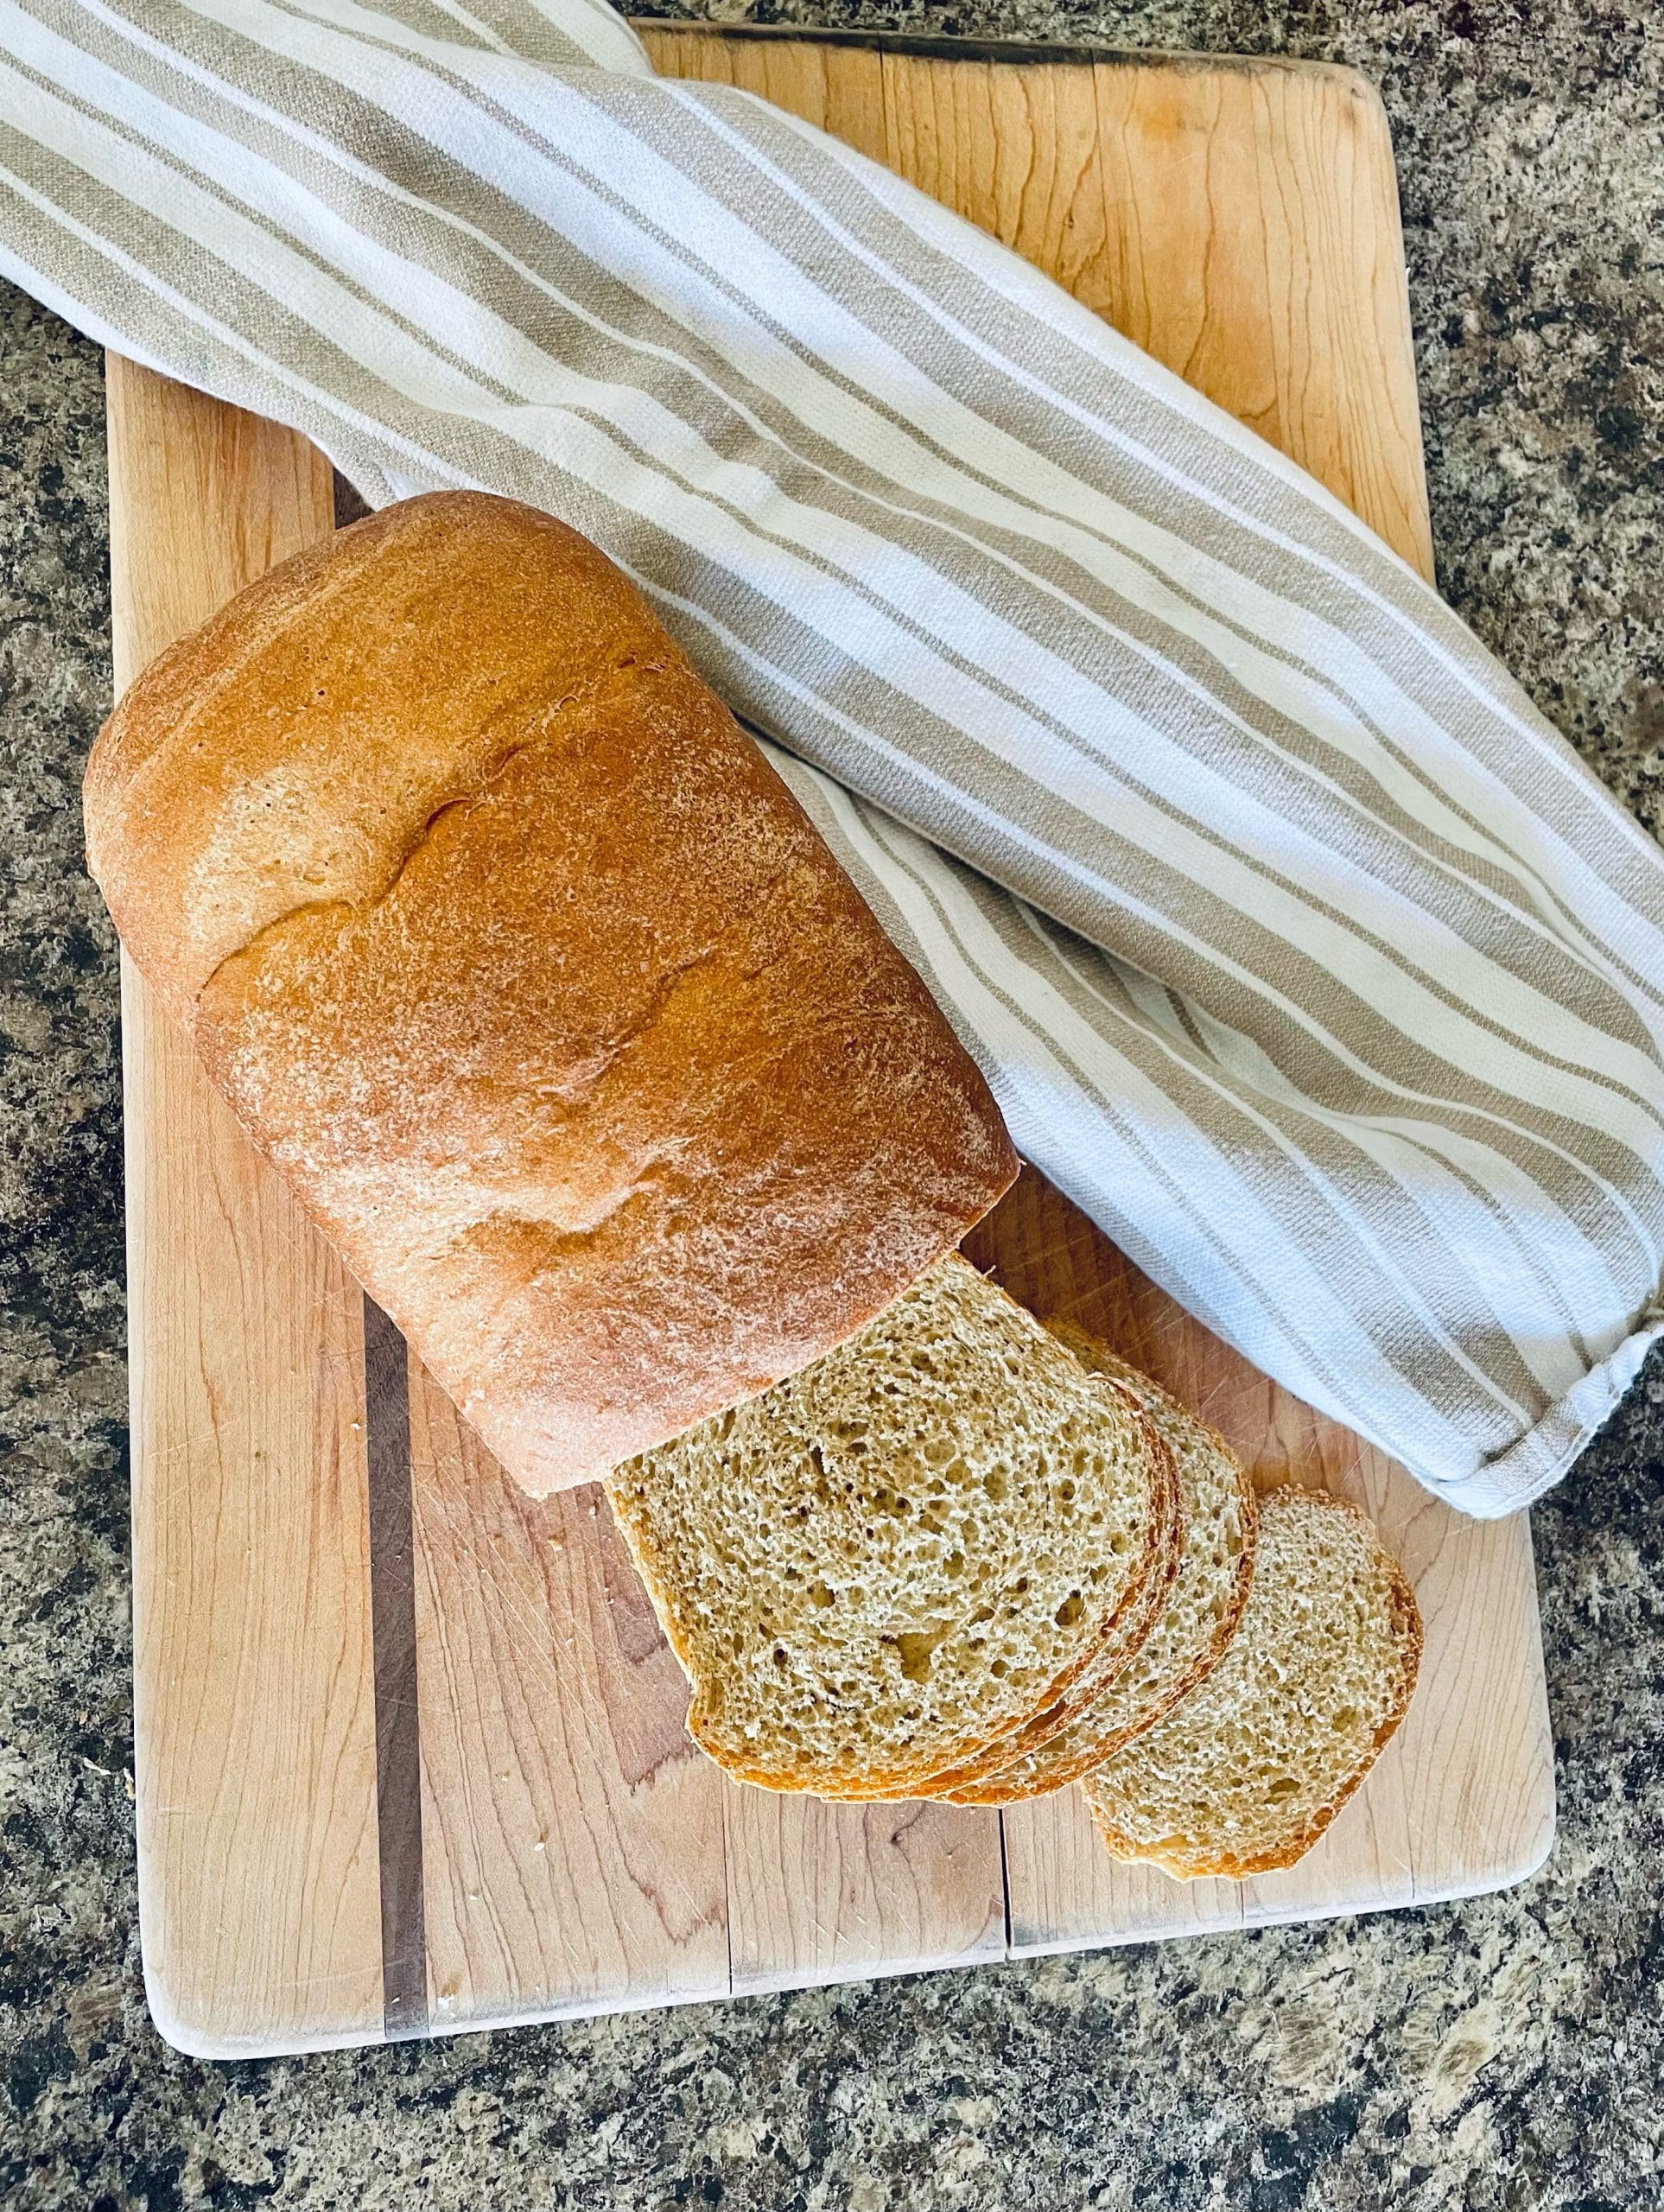
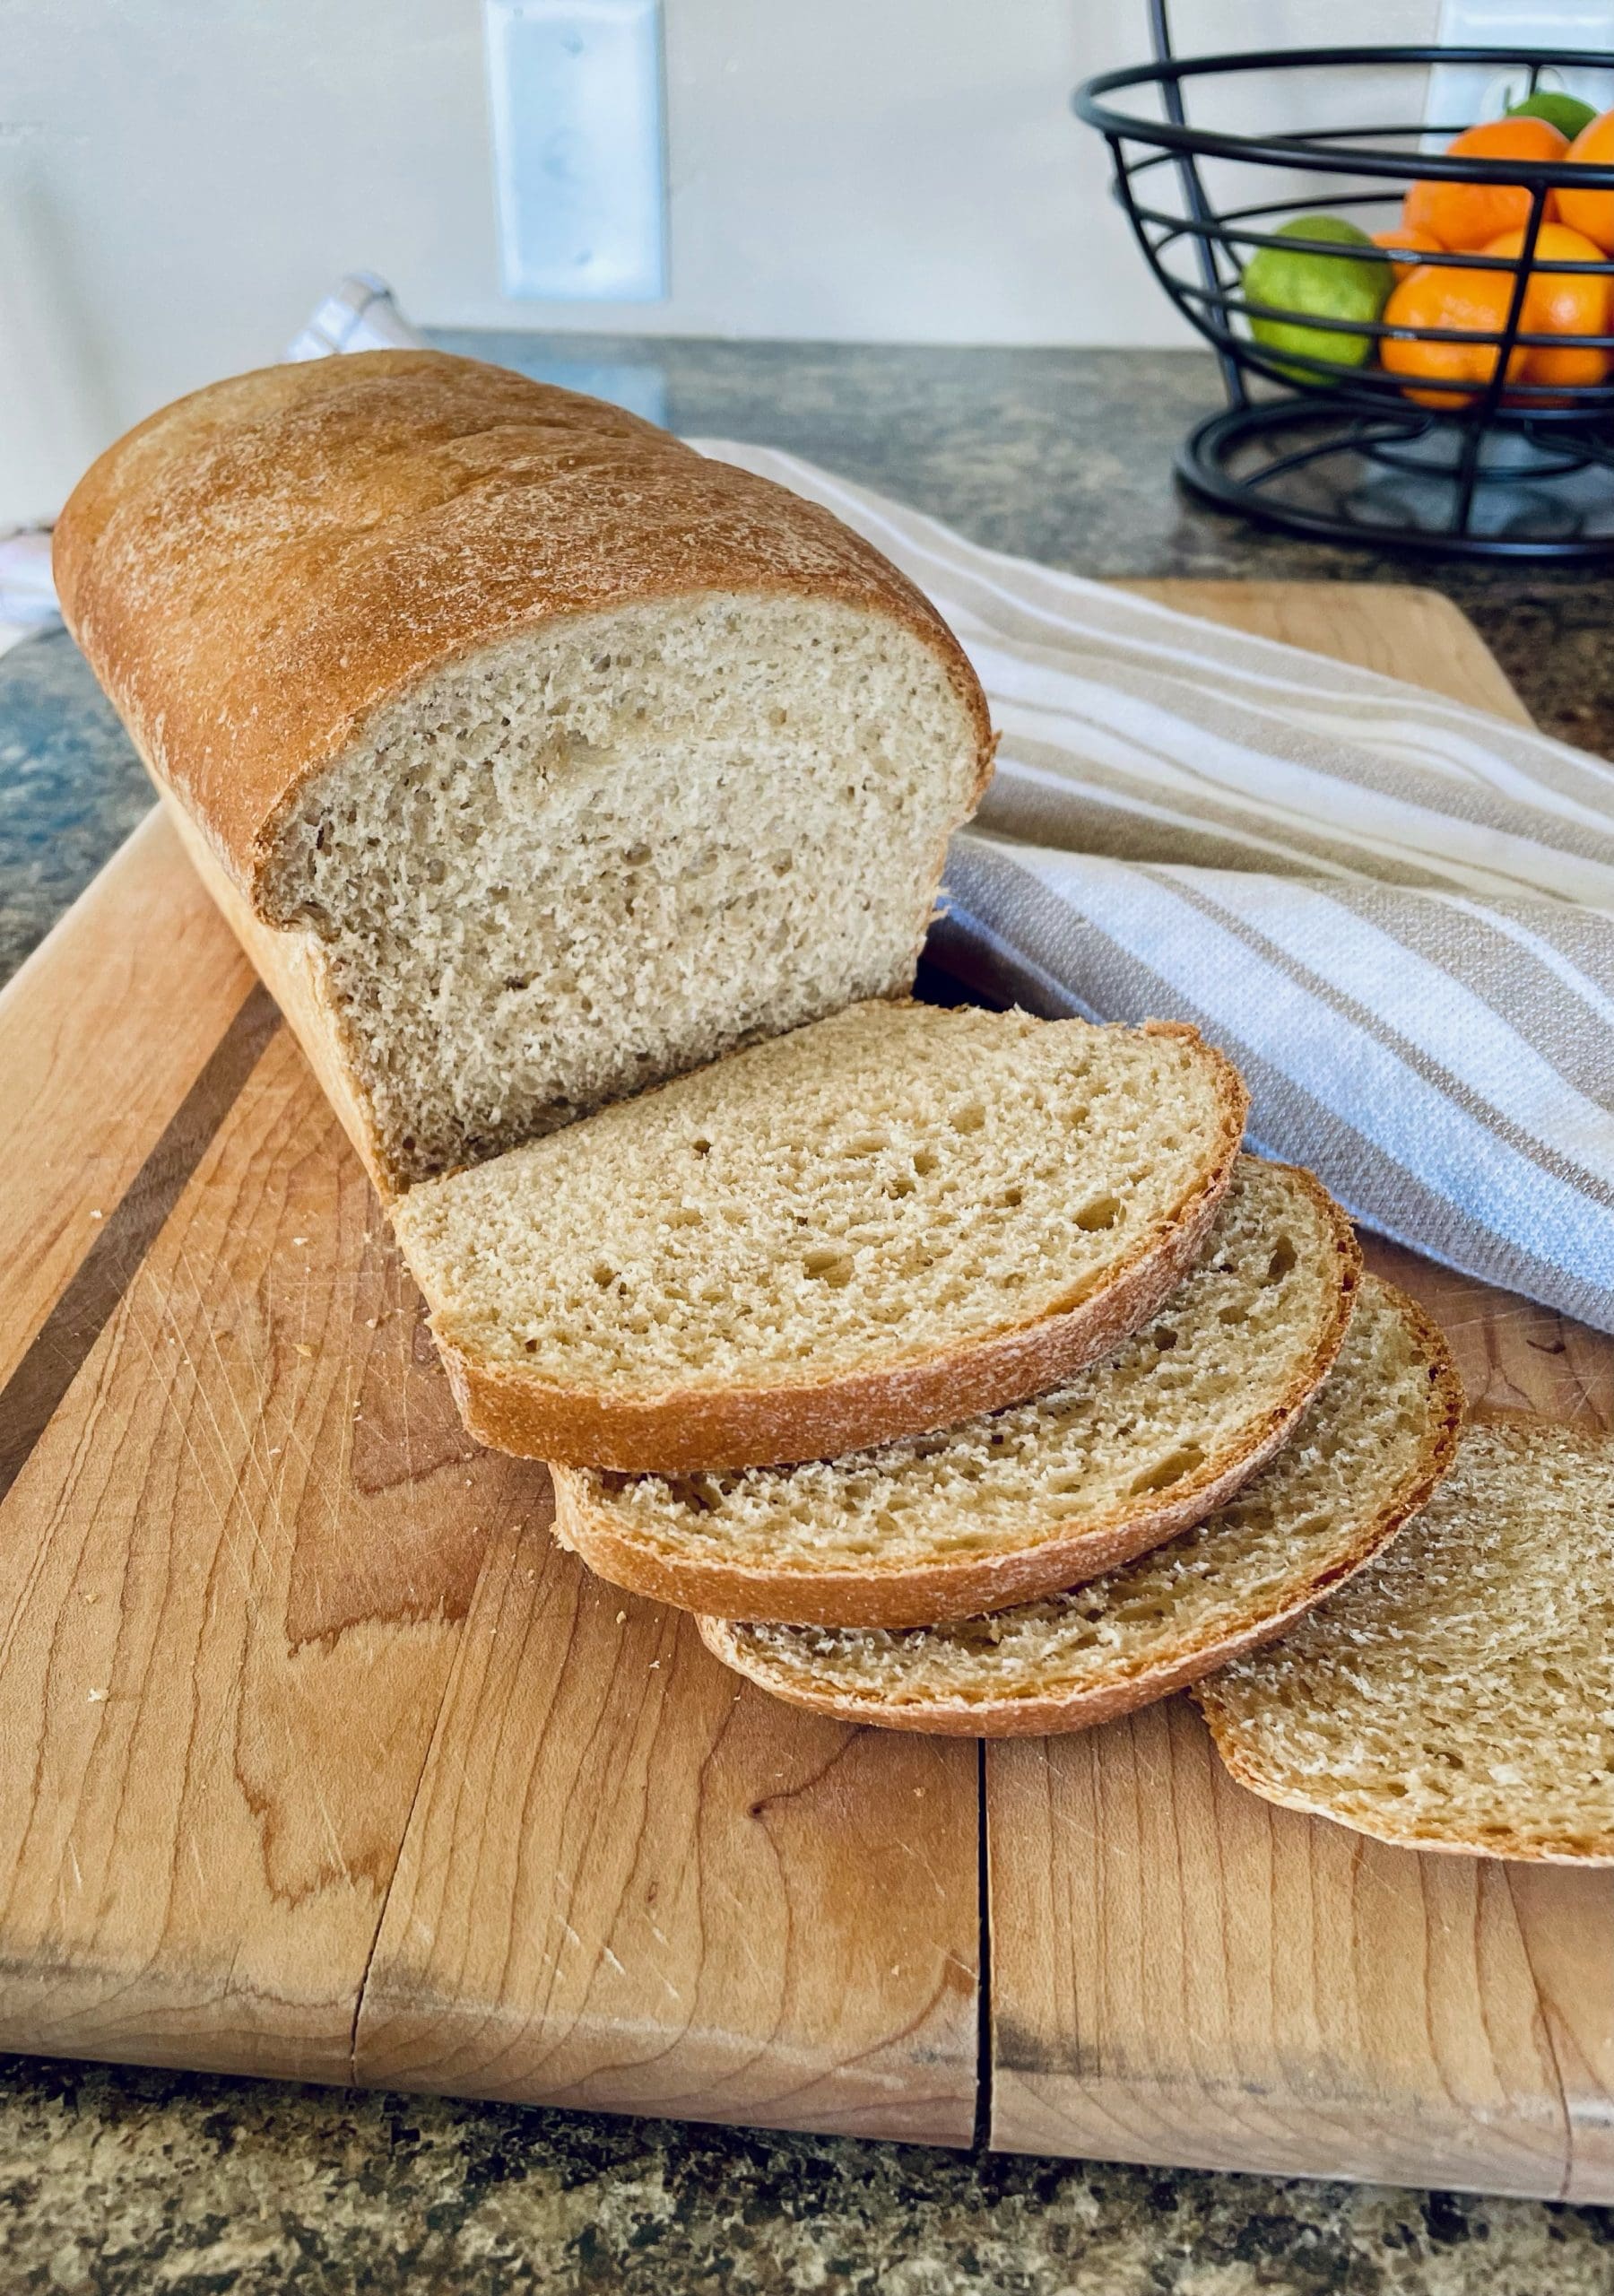
Super Yummy 100% Whole Wheat Bread
This recipe will help you make fluffy, delicious, 100% whole wheat bread. No more store-bought bread for you! It is great for toast, sandwiches, or even just plain with butter.
Equipment
- Large mixing bowl
- Food scale
- Spatula
- Heating pad or stovetop warming zone
- Plastic wrap
- 8.5″x4.5″ loaf pan – It is possible to use a larger 9″x5″ loaf pan but it will likely rise less and result in a shorter loaf.
- Oven
- Wire cooling rack
- Serrated knife
Ingredients
- 236 grams lukewarm water
- 42 grams honey
- 5 grams Instant yeast
- 6 grams salt
- 43 grams softened, salted butter
- 37 grams Bob’s Red Mill Vital Wheat Gluten Flour
- 320 grams King Arthur’s White Whole Wheat Flour (If you wish for a more hearty whole wheat flavor, try King Arthur’s Whole Wheat Flour instead.)
- Oil cooking spray
Instructions
- Measure out all ingredients using a food scale. (The order of ingredients doesn’t really matter since we are using Instant Yeast. But if you are using Active Dry instead, you might consider adding your salt last so that it doesn’t affect the activity of your yeast. You could also let your honey, water and yeast bloom for 5-10 mins before adding the rest of your ingredients)
- Combine with spatula until you have a shaggy-looking dough. Mine is on the dryer side of shaggy. (See picture below)
 Turn dough out onto CLEAN, DRY counter. I repeat, do NOT flour your kneading surface!
- Knead for 12 minutes. (It will seem wet and sticky at the beginning. You might be tempted to add more flour but, resist the urge! The flour will slowly absorb all the water to become a smooth and elastic ball.)
- Put dough into clean, greased bowl and cover with plastic wrap. Place bowl on top of heating pad or stove warming zone to proof at 90-100 degrees F for 75 minutes.
- Prepare loaf pan by spraying with cooking oil spray.
- Transfer proofed dough onto clean, UN-floured surface. Flatten dough into a rectangle then roll into loaf shape.
- Carefully place rolled loaf into loaf pan and cover again with plastic wrap. Return to heating pad for another 30-45 minutes of proofing. (Use the poke method to find the perfect proofing time.)
- Preheat oven to 350 degrees F. Bake for 32-35 minutes until golden brown on top. (Check loaf at 25 minutes. If sufficiently browned, place aluminum foil to cover for remaining 7-10 minutes.)
- Remove loaf from oven and immediately remove from pan. Let cool completely on wire cooling rack before slicing with serrated knife.
- Enjoy!!
The Fold-Test – For me, the true test of a slice of sandwich bread is the Fold-Test. Can I fold a slice of bread into a half sandwich and it bends instead of breaking? This loaf passed the test!! Try it out for yourself! Happy baking!